


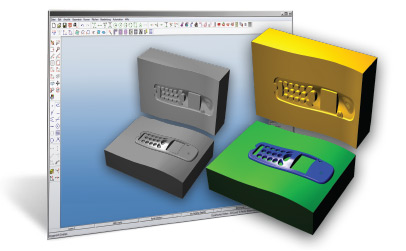


EZ-MILL Pro extends the standard EZ-MILL capabilities to meet the demanding needs of the prototype, tooling, die and mold professional. EZ-MILL Pro includes all the functionality of EZ-MILL plus surface creation and machining capabilities. 3D Surface Machining Wizard combines 12 different Roughing, Re-Roughing and Finishing strategies under a new and simple-to-use dialog box. Affordable CNC Milling Software.
What's New in Ezcam 2024 ? | Download Trial Version Now | Send Voice Message
Download Trial Version Now
3D Machining Workstep Wizard
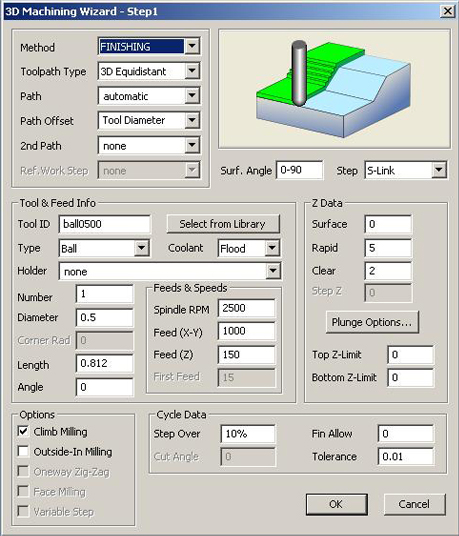 We have added a new 3D Surface Machining Wizard to the Machining menu. Beside many cycle related improvements, this new wizard now serves as the foundation for all 3D surface machining by combining all options under a new and simple-to-use dialog interface. It provides an easy to understand choice of methods and toolpath types which allow even inexperienced users to generate their first 3D toolpaths with a couple of clicks.
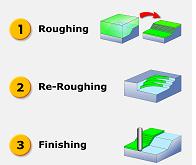
For most parts you may only need three work steps from solid stock to finished work piece. Simply select the desired Roughing, Re-Roughing or Finishing operation from the list, select the toolpath type that fits best to your model and add tools from the tool library. Additional settings are set to appropriate default values by the wizard so you can verify and display the desired toolpath right away on the screen. At any time you can return to the wizard dialog to optimize settings until you’re satisfied with the results, while additional help graphics provide valuable information.
This approach relies upon many years of experience combined with comprehensive research and user feedback. With just a few simple settings, any user, regardless of experience, can create a 3D machining work step utilizing EZ-CAM’s new surfacing strategies and create a complex toolpath. At the same time, the wizard does not keep experienced users from making use of the full range of toolpath options that are sometimes necessary to address specific machining requirements.
Download Trial Version Now3D Machining Strategies
Roughing
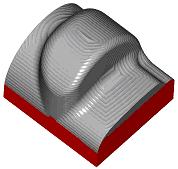
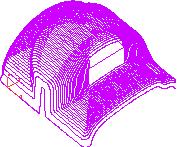
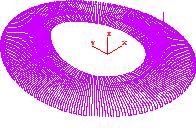
The Roughing methods use a horizontal slicing strategy to create machining regions in which a conventional 2.5 axis toolpath is generated. The selected Cut surfaces are offset in 3D by the specified tool then sliced at each Z Step interval. Intersection boundaries resulting from cavities or depressions are treated as pocketing areas, and intersections resulting from protrusions as islands.
- Pocketing – Creates a 2.5 axis offset pocketing toolpath.
- Parallel – Creates a 2.5 axis linear toolpath along a specified angle.
- Plunge –Creates plunge-drilling moves to the underlying surface along a series of rows at a specified angle.
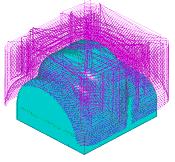
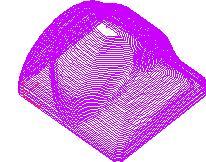
Roughing – Pocketing Toolpath
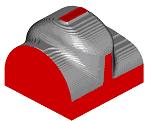
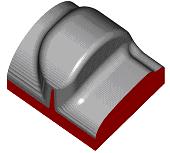
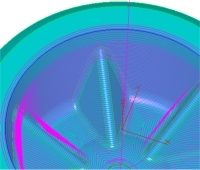
Solid Model Verification
Re-Roughing
The Re-Roughing methods use a specified, previously created, refer-ence Roughing work step to automatically calculate and create a 2D Rest Curve identifying the uncut regions remaining from the refer-ence work step. A conventional 2.5-axis curve roughing work step is then created and assigned to the Rest Curve and toolpath generated inside each region at the roughing Z Step intervals
- Pocketing – Creates a 2.5 axis offset pocketing toolpath.
- Parallel – Creates a 2.5 axis linear toolpath along a specified angle.
Finishing
The Finishing Methods use three distinct toolpath generation tech-niques as described below.
-
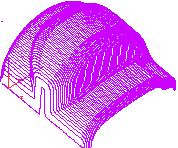
- 3D Equidistant – Creates 3D toolpath consisting of a series of on-surface offset passes similar to a pocking style toolpath that propagate from the selected Cut surface edges. Each pass is positioned at a uniform distance from the adjacent pass, regardless of surface slope.
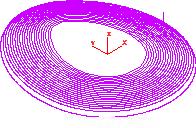
- Constant Z – Ceates 2.5-axis contouring passes at successive Z levels. The selected Cut surfaces are offset in 3D by the specified tool and sliced at each Z Step interval.
- Projection – Creates 3D toolpath by generating a 2D pattern and segmenting it into polylines based on the specified tolerance, then projecting each point to the selected Cut surfaces using the tool shape.
Re-Finishing
Refinishing method allows areas uncut by a preceding workstep, due to tool size or configuration, to be identified and re-machined using an equidistant toolpath. The Refinishing workstep uses the tool and parameters of a specified reference workstep to compute the uncut area boundaries, then applies an equidistant toolpath to them using the Refinishing workstep tool

Equidistant surface refinishing toolpath at the right side uses the toolpath at the left as reference and cleans up the corners with a smaller refinishing tool.
Pencil Milling
The Wizard now contains a new Pencil Milling method, which generates toolpath to machine all concave surface intersections where the specified tool makes dual contact. This capability is useful for removing material remaining in corners and along fillets in both finish and semi-finishing applications. Multiple Pencil Milling worksteps using progressively smaller tools can be used to trace along part features, gradually removing remaining material.
Product Comparison Chart
| EZ-MILL Express | EZ-MILL | EZ-MILL Pro | EZ-TURN Express | EZ-TURN | EZ-EDM | |
|---|---|---|---|---|---|---|
| Import/Export DXF/DWG/IGES | ||||||
| Import STEP/ACIS/PARASOLID/VDAFS/STL | ||||||
| Import SOLIDWORKS/RHINOCEROS | ||||||
| Wireframe Geometry Creation and Editing | ||||||
| Basic Dimensioning | ||||||
| Basic Engraving | ||||||
| Gears/Splines/Cams Geometry Creation | ||||||
| Multiple Layers and Colors | ||||||
| Multiple Construction / Machining Coord. Sys. | ||||||
| Silhouette Boundary Curve Creation | ||||||
| Basic Surface Creation and Editing | ||||||
| Advanced Surface Creation and Editing | ||||||
| Copy/Paste from Alibre (Solids Modeling & Design) | ||||||
| Single and Multi-pass Profiling | ||||||
| 3D Profiling | ||||||
| Thread Milling | ||||||
| ZigZag Pocketing | ||||||
| Offset Pocketing | ||||||
| UltraHSM Pocketing (High-Speed ) | ||||||
| Curve Machining Wizard | ||||||
| XYUV - Form Tool - Punch/Die Cycles | ||||||
| Tapered Tool & Wall Support | ||||||
| Standard Holemaking Canned Cycle Support | ||||||
| Rotary Axis Indexing (4th & 5th Axis) | ||||||
| Rotary Axis Wrapping | ||||||
| Equidistant Finishing | ||||||
| Automatic Constant Z Re-Roughing | ||||||
| Multi-Surface | ||||||
| Constant Z Roughing | ||||||
| Constant Z Finishing | ||||||
| Equidistant Re-Finishing | ||||||
| Pencil Milling | ||||||
| Rough Turning/Facing/Boring from Cylindrical Stock | ||||||
| Rough Turning/Facing/Boring from Custom Stock | ||||||
| Canned Cycle Roughing Support | ||||||
| Custom Auxiliary, Bar Pull and Cut-Off Cycles | ||||||
| Drilling/Threading/Grooving/Long Hand&Canned Cyc. | ||||||
| Toolpath Repetitions - Translate/Rotate/Mirror | ||||||
| Graphic Toolpath Verification Plotting | ||||||
| Solids Simulation Toolpath Verification | ||||||
| Dynamic Viewing Controls | ||||||
| Tool Library | ||||||
| Material Library | ||||||
| Integrated Spreadsheet Operations Manager | ||||||
| Library of Posts | ||||||
| Post Processor Editor | ||||||
| Visual Basic Automation Interface |


-
WEBiNAR - EZ-CAM v2024 "EZ-MILL Innovations" - CNC Milling Programming
-

EZ-CAM v2024 EZMILL Pro Features - Best CNC Milling Programming
-
Watch The Power Of EZ-MILL CNC Milling Machine Programming #EZCAM #cncmachining #cncmilling
-
Experience the Cutting-Edge Features of EZCAM 2023 : CNC Milling, CNC Lathe, EDM
-

New EZ Web Tools: Full Backup + Remote Work + Remote Support
-

EZ-MILL Express: Speed Up Production Process ! #cncmillingmachine
-

Contour Machining & Pocket Machining from Stock to Part Boundary - EZ-MILL - CNC Milling
-

Comparison of 3D Toolpath Strategies in EZ-Mill Express - EZ-Mill - EZ-Mill Pro - Cad / Cam Software
-

Curveless machining and Smart Click make powerful companions offering high level of automation
-

EZ-MILL Pro Ad - 3D Surface Machining - CNC Mill Solutions - Affordable CAD/CAM Software EZ-CAM
-

Curve Wizard New Features 2022 - EZ-CAM CAD/CAM Software - CNC Milling - CNC EDM - CNC Wire EDM
-

4th Axis Indexing using Custom Stock -Ez-cam Cad/Cam Software -CNC Milling-CNC EDM- CNC Mold Milling